


Blog
Liquid Ring Vacuum Pump Troubleshooting : Expert Guide
Liquid ring vacuum pumps are widely used in various industries such as oil and gas, mining, pulp and paper, vacuum coating, laboratory, sugar plants, pharmaceuticals, and more. These pumps are known for their efficiency and reliability in creating vacuum pressure for a wide range of applications.
However, like any mechanical equipment, liquid ring vacuum pumps can encounter issues that may affect their performance. Liquid ring vacuum pump troubleshooting requires a good understanding of the pump’s working principle, key components, and regular maintenance practices.
In this expert guide, we will explore the common issues that occur with liquid ring vacuum pumps and provide troubleshooting tips to address them effectively. We will also discuss maintenance best practices and advanced troubleshooting techniques to optimize the performance of these pumps.
Whether you are a maintenance engineer, technician, or simply someone interested in learning about vacuum pump troubleshooting, this guide will provide you with valuable insights to keep your liquid ring vacuum pump running smoothly.
HowLiquid Ring Vacuum Pumps Work
The basic working principle of a liquid ring vacuum pump involves the creation of a rotating liquid ring inside the pump’s casing. This liquid ring acts as a seal and enables the pump to create a vacuum.
The pump’s impeller rotates, creating centrifugal force that pushes the liquid toward the casing’s outer edge. As the liquid rotates, it creates a void or low-pressure zone in the center, which draws in air or gas through the pump’s inlet port.
The incoming air or gas is trapped in the liquid ring and carried towards the discharge port as the impeller continues to rotate. The liquid ring then compresses the trapped air or gas, increasing its pressure and discharging it from the pump.
To maintain the desired vacuum level, the pump’s suction and discharge pressures must be carefully regulated. Any deviations in these pressures can indicate potential issues with the pump’s operation.
Common Issues and Troubleshooting Tips
Despite their robust design, liquid ring vacuum pumps can experience common issues that may affect their performance. However, with proper maintenance and good troubleshooting skills, many of these problems can be resolved effectively.
Some common issues that may arise with liquid ring vacuum pumps include insufficient vacuum level, excessive noise or vibration, overheating problems, and pump leaks or corrosion. Troubleshooting these problems requires a systematic approach and a good understanding of the pump’s operation.
In the following sections, we will delve into each of these issues in detail and provide troubleshooting tips to address them.
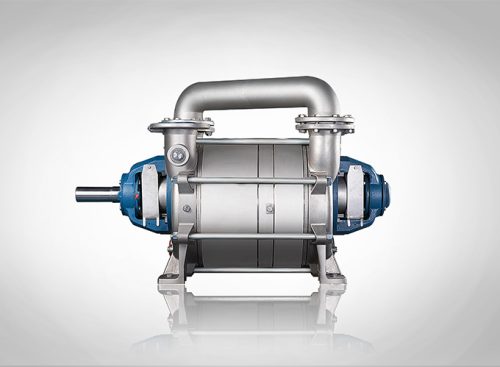
Issue 1: Insufficient Vacuum Level
Insufficient vacuum level is a common issue that may occur with liquid ring vacuum pumps. This problem can be caused by various factors, including inadequate water supply, high discharge pressure, or mechanical seal damage resulting in air leakage.
To troubleshoot this issue, follow these steps:
- Check the power supply voltage and ensure it is within the rated voltage range of the motor. Insufficient power supply can lead to insufficient speed and affect the vacuum level.
- Increase the water supply while ensuring it is controlled within the correct range. Insufficient water supply can result in poor vacuum performance.
- Reduce the clearance between the impeller and the distribution board. This clearance is typically between 0.15-0.20mm and affects the pump’s efficiency.
- Inspect the mechanical seal and replace it if damaged. A damaged mechanical seal can cause water leakage and air leakage, impacting the vacuum level.
- Check the pipeline at the water outlet for any blockages or restrictions that may inhibit the proper discharge of circulating water.
By following these troubleshooting tips, you can address the issue of insufficient vacuum level and restore the pump’s performance.
Issue 2: Excessive Noise or Vibration
Excessive noise or vibration in a liquid ring vacuum pump can be indicative of underlying issues. These issues can include problems with bearing clearance, roller bearings, or cavitation.
To troubleshoot excessive noise or vibration, consider the following steps:
- Check the power supply voltage and ensure it is within the rated voltage range of the motor. Insufficient voltage can lead to motor operation issues and cause excessive noise or vibration.
- Inspect the motor wiring to ensure it is reliable and properly connected. Loose or faulty wiring can contribute to noise and vibration.
- If the vacuum pump has been unused for a long time, add a rust remover or manually remove any rust from the pump. Corrosion can cause noise and vibration during operation.
- Inspect the impeller and shaft for any damage or wear. Replace the impeller if excessive wear is observed.
- Check the distance between the impeller and the distribution board. Adjust the distance to ensure smooth operation and minimize noise and vibration.
By addressing these issues, you can mitigate excessive noise and vibration in the liquid ring vacuum pump.
Issue 3: Overheating Problems
Overheating problems can occur in liquid ring vacuum pumps due to various reasons, including excessive water supply, motor overload, blockage in the exhaust hole, or improper clearance between the impeller and other components.
To troubleshoot overheating problems, follow these steps:
- Reduce the water supply to the normal range as specified in the vacuum pump operation manual. Excessive water supply can lead to motor overload and overheating.
- Check the motor wiring and ensure it is secure and properly connected. Loose or faulty wiring can cause motor overheating.
- Inspect the exhaust port for any blockages or restrictions. Clear any debris or foreign objects that may hinder proper exhaust flow.
- Open the vacuum pump cover and adjust the clearance between the impeller and other components. Proper clearance is essential for smooth operation and heat dissipation.
By addressing these issues, you can prevent overheating problems and ensure the efficient operation of the liquid ring vacuum pump.
Issue 4: Pump Leaks or Corrosion
Pump leaks or corrosion can compromise the performance and reliability of a liquid ring vacuum pump. These issues can be caused by factors such as corrosion, damaged gaskets, or faulty piping.
To troubleshoot pump leaks or corrosion, consider the following steps:
- Inspect the pump for any signs of corrosion. Corrosion can weaken the pump’s structure and lead to leaks. If corrosion is detected, consider applying suitable protective coatings or replacing corroded components.
- Check the gaskets and seals for any damage or wear. Replace any damaged gaskets to prevent leaks.
- Inspect the piping and connections for any leaks. Tighten loose connections or replace damaged piping to prevent leaks.
- Consider implementing a regular maintenance and inspection schedule to identify and address any potential leaks or corrosion issues before they worsen.
By addressing these issues proactively, you can prevent pump leaks and corrosion, ensuring the reliable operation of the liquid ring vacuum pump.
Description of Other Faults
Apart from the common issues mentioned earlier, liquid ring vacuum pumps can also experience other faults related to mechanical seals and overall pump operation.
In the following sections, we will discuss these faults in detail, including improper disassembly of mechanical seals, excessive pressure of icing water on the machine seal, and broken dynamic and static book covers.
Improper Disassembly of Mechanical Seal
Improper disassembly of a mechanical seal during replacement can lead to seal failures and subsequent leaks. One common mistake is not installing the O-ring on the moving ring properly, resulting in poor sealing performance.
To avoid this issue, follow these steps during the disassembly and replacement of a mechanical seal:
- Ensure that the O-ring is correctly installed outside the sealing groove on the moving ring seat.
- Take care to install the new mechanical seal properly, following the manufacturer’s guidelines and recommendations.
By following these steps, you can prevent seal failures due to improper disassembly and ensure the effective sealing performance of the mechanical seal.
Excessive Pressure of Icing Water of Machine Seal
One common issue that can arise with liquid ring vacuum pumps is the excessive pressure of icing water of the machine seal. When the water pressure in the seal increases too much, it can lead to icing, causing operational difficulties. To troubleshoot this problem, ensure that the water supply to the seal is within the recommended range and the pressure is controlled. Adjusting the water temperature to its original thickness can also help prevent icing issues with the machine seal. Regular monitoring and maintenance are crucial to avoid this issue.
Dynamic and Static Book Cover Broken
Dynamic and static book cover breakage is another fault that can occur during the replacement of the pump seal. This issue arises when the shaft collapses and skews during the replacement process, causing the dynamic and static rings to squeeze and break.
To prevent this issue, follow these steps during the replacement of a pump seal:
- Assemble the bearing (bearing seat) at the corresponding end before installing the new mechanical seal. This step provides support to the shaft and prevents its collapse and skewing.
- Ensure that the shaft and impeller are well-supported and do not lose their stability during the replacement process. This prevents excessive weight on the dynamic and static rings and avoids breakage.
By following these steps, you can prevent the dynamic and static book cover from breaking during the replacement of the pump seal.
Maintenance Best Practices
Proper maintenance is crucial for ensuring the long-term performance and reliability of liquid ring vacuum pumps. Implementing routine inspection and maintenance practices can help identify and address potential issues before they escalate.
Key maintenance best practices for liquid ring vacuum pumps include:
- Conduct routine inspections to check the operation and lubrication of the bearings.
- Monitor the temperature of the bearings to ensure they do not exceed the recommended limits.
- Regularly inspect and replace the packing to maintain the required sealing performance.
- Perform periodic cleaning of the pump and check for any debris or obstructions.
- Implement a schedule for oiling and cleaning the bearings as per the manufacturer’s recommendations.
By following these maintenance best practices, you can extend the lifespan of the liquid ring vacuum pump and optimize its performance.
Routine Inspection and Cleaning
Routine inspection and cleaning are essential maintenance activities for liquid ring vacuum pumps. Regularly inspecting the pump’s components and cleaning any debris or build-up can prevent performance issues and prolong the pump’s lifespan.
During routine inspections, pay attention to the following:
- Check the operation and lubrication of the bearings to ensure smooth functioning.
- Monitor the temperature of the bearings and ensure it remains within the recommended range.
- Inspect the clearance between the impeller and other components and adjust if necessary.
- Clean the pump’s internal and external surfaces to remove any debris or dirt.
By incorporating routine inspections and cleaning into your maintenance practices, you can identify and address any potential issues early on, ensuring the pump operates optimally.
Seal and Bearing Care
Proper care of the mechanical seal and bearings is essential for maintaining the performance and longevity of a liquid ring vacuum pump.
To ensure the effective sealing performance of the mechanical seal and optimal bearing operation, follow these best practices:
- Regularly inspect the mechanical seal for any signs of wear or damage. Replace the seal if necessary to prevent leaks.
- Monitor the bearing clearance and adjust it as per the manufacturer’s recommendations.
- Lubricate the bearings regularly to reduce friction and ensure smooth operation.
- Clean the bearings periodically to remove any debris or dirt that may affect their performance.
By prioritizing the care of the mechanical seal and bearings, you can prolong the life of the liquid ring vacuum pump and prevent potential issues.
Optimizing Operational Parameters
Optimizing the operational parameters of a liquid ring vacuum pump is crucial for ensuring its efficient performance and longevity. Factors such as the vacuum level, suction pressure, discharge pressure, and power supply voltage can impact the pump’s operation.
To optimize the pump’s operational parameters, consider the following:
- Maintain the vacuum level within the recommended range for the specific application.
- Ensure the suction and discharge pressures are set to the optimal levels for efficient operation.
- Regularly check and maintain the power supply voltage within the rated voltage range to prevent motor issues.
By optimizing these operational parameters, you can maximize the efficiency and reliability of the liquid ring vacuum pump.
Advanced Troubleshooting Techniques
Advanced troubleshooting techniques can be employed to diagnose and address complex issues that may arise with liquid ring vacuum pumps. These techniques involve utilizing tools such as vacuum gauges and applying good troubleshooting skills.
In the following sections, we will explore two advanced troubleshooting techniques: diagnosing with performance curves and utilizing vacuum gauge readings. These techniques can provide valuable insights into the pump’s performance and help identify and resolve any underlying issues.
Diagnosing with Performance Curves
Diagnosing issues with a liquid ring vacuum pump can be done effectively by utilizing performance curves. These curves provide graphical representations of the pump’s performance characteristics, such as the relationship between the vacuum level and discharge pressure.
By referring to the performance curves, you can identify potential issues such as deviations from the expected vacuum level and discharge pressure. This information can guide troubleshooting efforts and help pinpoint the root cause of the problem.
Below is an example of a performance curve that illustrates the relationship between the vacuum level and discharge pressure:
Vacuum Level (mbar) | Discharge Pressure (bar) |
100 | 2.0 |
200 | 1.8 |
300 | 1.6 |
400 | 1.4 |
500 | 1.2 |
By analyzing the performance curve and comparing it to the actual operating conditions, you can gain insights into any discrepancies and troubleshoot accordingly.
Utilizing Vacuum Gauge Readings
Utilizing vacuum gauge readings is an effective troubleshooting technique for liquid ring vacuum pumps. A vacuum gauge measures the vacuum level inside the pump and provides valuable information about its performance.
To utilize vacuum gauge readings for troubleshooting, follow these steps:
- Connect the vacuum gauge to the pump’s suction port or an appropriate measuring point.
- Monitor the vacuum level indicated on the gauge. Compare it to the desired vacuum level for the specific application.
- If the vacuum level is below the desired range, inspect the pump for any potential issues such as insufficient water supply, mechanical seal damage, or impeller wear.
- Ensure proper maintenance practices are followed, such as routine inspection and cleaning, to minimize any deviations from the desired vacuum level.
By utilizing vacuum gauge readings, you can assess the pump’s performance and take appropriate actions for troubleshooting.
Addressing Mechanical Seal Failures
Mechanical seal failures can occur in liquid ring vacuum pumps and lead to leaks and decreased sealing performance. Addressing these failures promptly is crucial for maintaining the pump’s efficiency.
To address mechanical seal failures, consider the following steps:
- Inspect the mechanical seal for any signs of wear or damage. If the seal is old and worn, it may need to be replaced with a new one.
- During the replacement process, ensure the new mechanical seal is installed correctly. Follow the manufacturer’s guidelines and recommendations for proper installation.
- Perform a leakage test after the replacement to ensure the new mechanical seal is functioning effectively and providing the required sealing performance.
By addressing mechanical seal failures promptly and implementing proper installation techniques, you can maintain the sealing performance of the liquid ring vacuum pump.
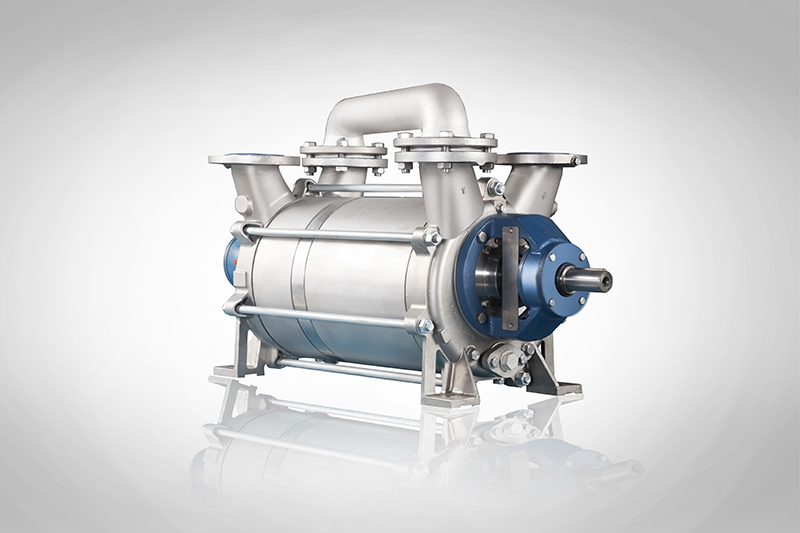
Choose a Liquid Ring Vacuum Pump from Vacculex
When selecting a liquid ring vacuum pump, it is essential to choose a reliable and reputable manufacturer. Vacculex is a leading provider of high-quality liquid ring vacuum pumps that are known for their performance and durability.
When choosing a liquid ring vacuum pump from Vacculex, consider factors such as the specific application requirements, desired vacuum level, and available horsepower. Vacculex offers a range of options to suit various industry needs.
Consult with Vacculex’s experts to determine the most suitable liquid ring vacuum pump for your specific application. Their expertise and knowledge can help you make an informed decision and ensure optimal vacuum pump performance.
Conclusion
In conclusion, understanding the common issues and troubleshooting tips for liquid ring vacuum pumps is essential to ensure optimal performance. By implementing maintenance best practices and utilizing advanced troubleshooting techniques, you can prevent and address potential problems effectively. Remember to conduct routine inspections, care for seals and bearings, and optimize operational parameters for efficient pump operation. By choosing a reliable liquid ring vacuum pump from Vacculex, you can enhance your industrial processes with confidence. For quotes and commercials, reach out to us for expert guidance and support.